Commercial Surveyor Services

Bradley-Mason LLP is a Chartered Building Surveying practice who offer the full range of Surveying, Building Consultancy and Project Management Services throughout the UK.

Our senior level team provide expert advice, with a focus on a quick turnaround service to maximise value and to fully understand our client’s businesses and property requirements. Ranging from investment funds and private Landlord’s to High Street retailers and commercial Tenant’s, we offer advice on the whole life cycle of their property interest from acquisition to disposal. Our aim is to predict your needs and ensure your expectations are exceeded. We question your requirements to ensure that our services are tailored to your current and future needs.

Dilapidations: what are your rights as a commercial landlord?

Dilapidation House Contact our expert team banner

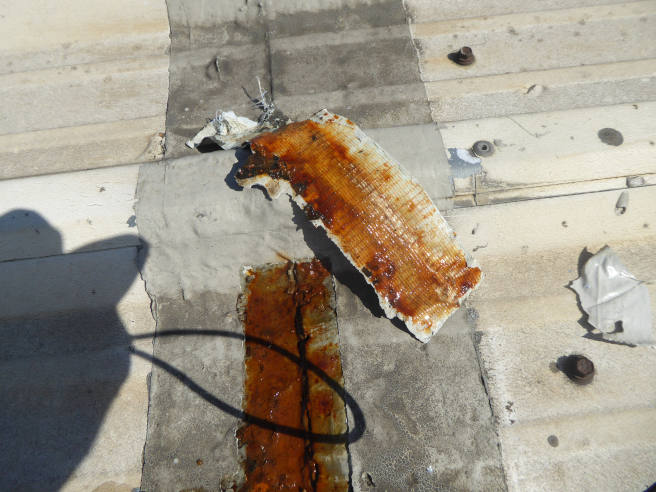
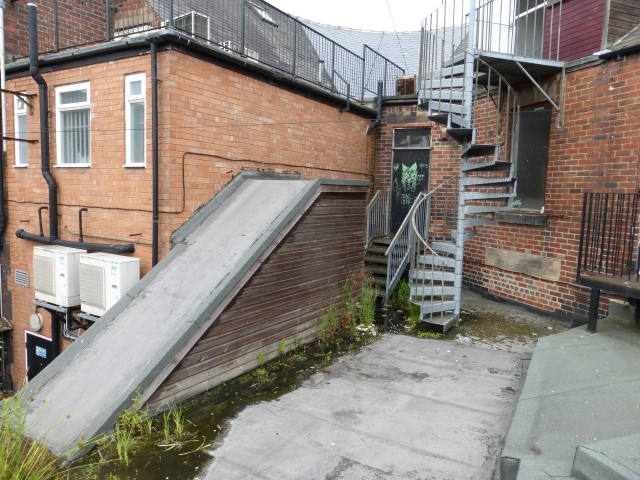
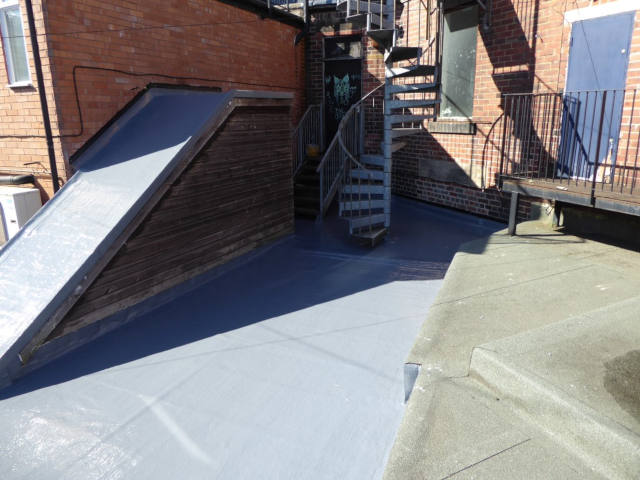
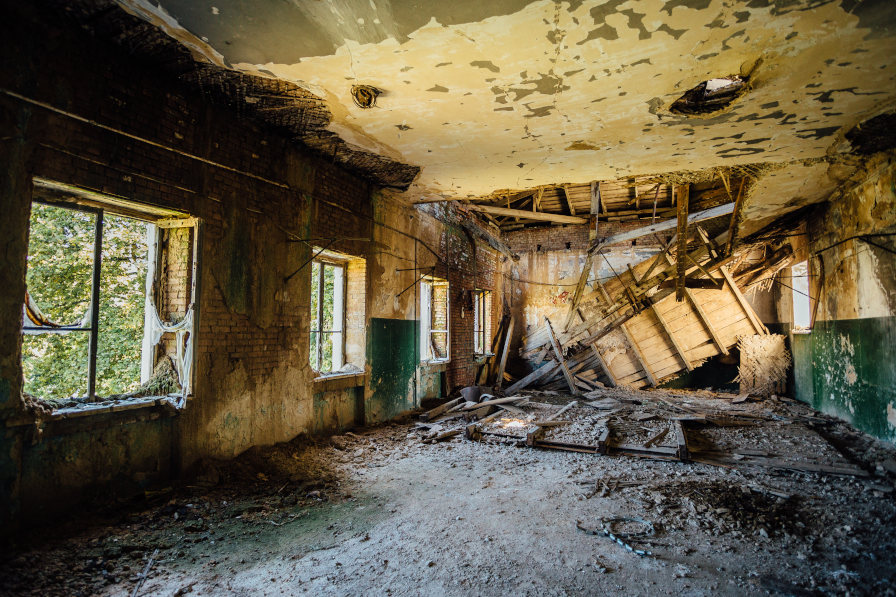
When a commercial lease comes to an end, the process of assessing and claiming dilapidations can often become contentious between landlords and tenants. Dilapidations refer to disrepairs, damages or alterations made without consent that the tenant is liable for rectifying when they vacate the property at the end of the lease term. When presented with a Schedule of Dilapidations, tenants may view the required repairs as unexpected costs and disputes can arise.

As a commercial landlord, it is important to understand your rights under the law regarding who pays or a dilapidation report and the claims process to protect your interests from tenant actions. Having a clear understanding of your legal position can help ensure the dilapidations process goes smoothly.

Understanding Your Rights Regarding Dilapidations

As a commercial landlord in the UK, you have certain key rights when it comes to dilapidations claims that are important to be aware of. First, under the Landlord and Tenant Act 1927, landlords have an automatic right to claim against tenants for any breaches of their repairing obligations or damages to the property. This means you can legally seek compensations for disrepairs or alterations the tenant was responsible for rectifying per the lease agreement.

You also have the right to serve a Schedule of Dilapidations on the tenant during the last 6 months of the lease term. This detailed document will specify all the dilapidations issues that need to be remedied before the lease expires. The tenant is legally obligated to address these dilapidations outlined prior to vacating the premises. As a landlord, it’s advisable to engage a Schedule of Condition at the beginning of a lease to protect yourself and your tenants.

In addition, the 1927 Act grants landlords the right to inspect the property’s condition at any point during the lease term, as long as proper notice is provided to the tenant. This allows you to identify potential dilapidations early on and bring them to the tenant’s attention.

Who Pays for the Dilapidation Report?

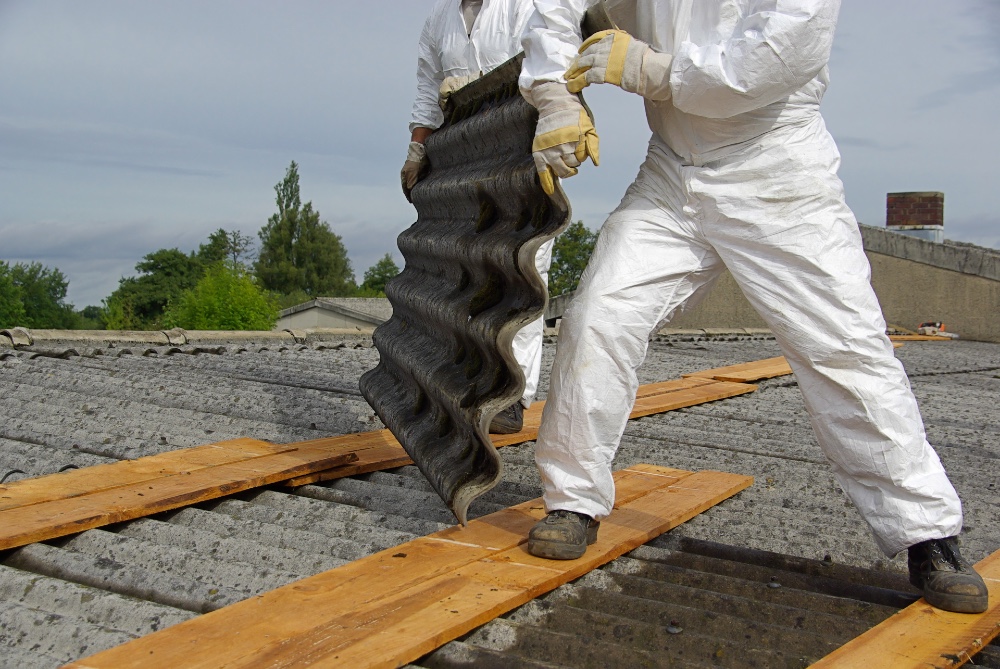
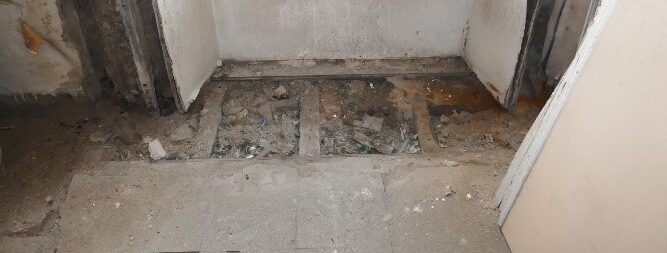
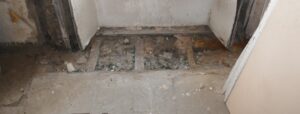
A dilapidation report conducted by a surveyor is a key piece of evidence in supporting a landlord’s claim. But who is responsible for covering the cost of this report – the landlord or the tenant? In most cases, it is the landlord who pays for the dilapidation survey report upfront. The cost then gets built into the overall claim against the tenant for compensations.

For a report to be considered impartial evidence, it should be commissioned independently by the landlord rather than jointly. The landlord has a right under property law to inspect the premises during the lease term after giving notice. Therefore, they can commission reports whenever needed. If the claim goes to court and succeeds, the judge may award the reasonable cost of the report back to the landlord as part of the judgement.

While the landlord typically pays upfront, if repairs are deemed the responsibility of the tenant, the cost of an independent dilapidation survey is a recoverable expense through the compensation claim process.

What is the Process for Pursuing Dilapidation Payments?

If a commercial tenant fails to satisfactorily meet the terms of a dilapidations agreement by rectifying disrepairs to the proper standard before vacating the property, the landlord may need to take further steps to recover the costs incurred.

Property lawyers typically advise landlords to conduct a thorough property inspection or have a dilapidations survey carried out before the end of the lease term. This allows time to hopefully resolve any disputes through negotiation rather than resorting to formal legal proceedings, which can be prolonged and expensive for both parties.

If the tenant refuses to willingly compensate the landlord for identified dilapidations issues, the landlord can formally serve a Schedule of Dilapidations prepared by an independent surveyor outlining the breaches of repair obligations. If the disrepairs remain unaddressed when the tenant vacates at lease end, the landlord has the right to enter the property, survey conditions and undertake necessary repairs.

The next step would be for the landlord to send a formal letter demanding the tenant pay the dilapidations costs within a set timeframe. Mediation is also an option before going to trial to reach a settlement.

Taking a Claim to Court

If a commercial tenant refuses to pay for dilapidations after receiving the landlord’s formal demand for compensation, the matter may end up being resolved through the court system. The landlord will need to file a Part 7 claim with the appropriate court based on the property’s location and serve it on the tenant to initiate proceedings.

From there, both parties will go through a process of disclosing all relevant documents, including property reports, correspondence, repair estimates, photos and more. If no settlement agreement can be reached beforehand, the court will set a trial date, and all involved must exchange witness statements and expert evidence prior.

Overall, pursuing a dilapidation claim in court can be time-consuming and complex. Landlords should seek experienced legal help to build the strongest possible case with thorough evidence and preparation.


Dilapidations can be a complicated and often contentious matter that can be notoriously difficult to resolve. This is where our dilapidation surveys can offer real benefits. Our dilapidation surveyors will help identify the areas where damage or alteration to the property has occurred and where tenants are liable for repairs, and provide expert assistance to help with any court cases.

To find out more about commercial dilapidation surveys at Bradley-Mason LLP and how we can help you, contact us today and we will be delighted to answer any queries.

DISCLAIMER: This article is for general information only and not intended as advice. Each project has its own set of unique circumstances, all potential issues should be investigated by a surveyor on a case by case basis before making any decision.

Contact our expert team banner

Cut Edge Corrosion – what (not) to do

Cut Edge Corrosion image Contact our expert team banner

Our commercial roof surveys often identify signs of cut edge corrosion on metal roof cladding. In fact, it’s one of the most common problems on industrial sites, which occurs to metal roofing sheet laps and sheet ends. Cut edge corrosion or CEC looks unsightly but it can also lead to rusting which, if left untreated, can cause irreparable roof leaks and costly roof replacements. For this reason, we strongly recommend dealing with CEC as soon as possible.

What is Cut Edge Corrosion and What Causes It?

Cut edge corrosion is a common issue that affects the metal roofing and siding on commercial buildings. It occurs when the cut edge of a metal sheet is exposed to the elements and begins to corrode over time. Cut edge corrosion typically starts as edge peel at the cut edges of a metal sheet. Pre-finished roof sheeting is cut to size at the manufacturers to fit the building in question, but if the cut edge isn’t weatherproofed, it can leave the material exposed to the elements.

Through natural weathering, this exposed edge can start to corrode. This process then accelerates, particularly at sheet overlaps where rainwater is held by capillary action. The overlapping sheets create a crevice where water can collect and sit stagnant, accelerating corrosion along the cut edge.

Edge corrosion is a progressive problem – left untreated, it can cause the protective coatings on the metal sheets to peel away, revealing the bare metal underneath and allowing further corrosion to take hold. The corrosion can then spread inward from the cut edge, destroying the weather-sealed lap joints and gutter overhangs. This ultimately threatens the waterproofing ability of the roof or siding.

The Impact of Cut Edge Corrosion

Over time, cut edge corrosion can significantly damage metal roofs, cladding, gutters and other metal components of commercial buildings. Left unchecked, it can necessitate full roof or siding replacement, with major financial implications.

On metal roofs, corrosion spreading inward from cut edges can lead to complete failure of the roof sheets and coatings. This allows moisture intrusion, interior damage and ultimately roof collapse which poses health and safety risks and building compliance issues. Replacing an entire commercial metal roof is extremely costly and time-consuming, which can negatively impact your business. Metal cladding on walls is also vulnerable. Corrosion along cut edges can allow moisture penetration behind the cladding, leading to deterioration of the wall structure itself. Damaged cladding must be replaced to restore proper weatherproofing.

In gutters, corrosion typically starts at seams and joints where water accumulates. It can also occur due to galvanic corrosion if different metals are used. Damaged gutters can leak and cause interior water damage. They may need to be partially or fully replaced.

Preventing Cut Edge Corrosion

Routine inspections along cut edges should be performed to look for early signs of corrosion or coating failure, especially in the case of commercial tenancies. Catching and treating cut edge corrosion in early stages can help building owners avoid extensive repairs down the road.

Effective preventative measures include:

  • Inspecting metal roofing, cladding and gutters regularly for early signs of corrosion along cut edges or seams. This allows prompt treatment before major damage occurs.
  • Applying corrosion-inhibiting sealants or tapes along cut edges and seams during installation. Ensure products used can adhere properly when metal expands and contracts.
  • Keeping gutters clean and clear of debris to prevent moisture build up. Check that gutters are properly sloped to drain correctly.
  • Replacing damaged or corroded sections of metal roofing to stop deterioration from spreading.
  • Consulting roofing and building experts to identify the optimal solutions for preventing and treating cut edge corrosion issues.

Treating Cut Edge Corrosion

Early detection and treatment of cut edge corrosion is highly recommended to prevent costly metal sheet replacement in the future. But it isn’t always possible and once corrosion has set in, treatment is vital. Once cut edge corrosion has taken hold, prompt treatment is required to stop further deterioration. The most effective solutions involve:

  • Removal of any loose, flaking metal and corrosion deposits along cut edges and seams. This provides a clean surface for sealants and coatings to adhere to.
  • Application of a high-strength, flexible sealant along cut edges and lap joints. The sealant fills in crevices and prevents moisture from accumulating. Flexibility allows it to move with the metal’s expansion and contraction.
  • Coating cut edges and damaged areas with a corrosion-inhibiting hybrid coating. This forms an impermeable moisture barrier when added to coatings and provides superior corrosion resistance compared to standard coatings.
  • Spot repairs or full replacement of badly corroded sections of metal roofing, gutters or wall panels as needed. This stops deterioration from spreading to adjacent areas.

At Bradley-Mason, we’ve had great results with Sika Liquid Plastics, a tried and tested effective surface treatment for the onset of cut edge corrosion for all commercial properties. Designed to extend the lifespan of the roof surface, sheets remain structurally sound without compromising the waterproofing function.

Here’s a recent before/after example:


Roof coating - project image

Roof coating - project image

Common Mistakes When Treating CEC

Attempting to treat cut edge corrosion without proper training and preparation often leads to failure and recurring issues. Insufficient training on the application of sealants or coatings is a common mistake, which can lead to inadequate corrosion protection.

Likewise, failing to clean and prepare cut edges before applying products can prevent good adhesion. Ensure edges are free of loose metal, rust and other contaminants, and use a primer on rusted areas for better coating bonding. Trying to rush through treatment without dedicating enough time to identify all affected areas, clean thoroughly, apply products correctly and allow proper curing can lead to missed corrosion and product failure.

Seek Professional Expertise

At Bradley-Mason, our team of commercial surveyors have worked with numerous businesses over the years to help them resolve cut edge corrosion on their property. If you would like advice on how to prevent or treat CEC, contact us today.

DISCLAIMER: This article is for general information only and not intended as advice. Each project has its own set of unique circumstances, all potential issues should be investigated by a surveyor on a case by case basis before making any decision.

Contact our expert team banner

A History of Unusual Building Materials Used in the UK

Asbestos Survey Hero Image Contact our expert team banner

Here in the UK, we’re rightly proud of the long and traditional history that is still visible today in the buildings of our villages, towns and cities. The architecture of the United Kingdom reflects its long and storied history, with each era leaving its physical mark through the buildings and structures left behind.

As chartered building surveyors, we conduct countless surveys and visits to the nation’s old and listed buildings, many of which still retain the traditional unusual building materials used in their construction many hundreds of years ago. Here, we’ve compiled some of the more unusual building materials that have been traditionally used in construction in the UK, many of which may still be present in older commercial properties today.

Wattle and Daub

Wattle and daub construction has been used for thousands of years, first originating some 6,000 years ago. It involves a timber frame filled with a mixture of mud, clay, straw and animal dung. Many Tudor buildings still standing feature wattle and daub walls – while picturesque, these walls require careful maintenance to remain structurally sound and weatherproof. Specialist skills are needed for repairs, and tenants living in buildings with this construction technique will be expected to keep them in excellent condition under the terms of their dilapidations agreements.

Asbestos

Asbestos was popular as an insulating material in the 1900s until its health hazards came to light. Any property built between 1930 and 1999 could still contain asbestos. Strict procedures have to be followed when it comes to inspection, maintenance and removal to avoid inhaling toxic fibres. Asbestos removal can be expensive but it’s a necessary part of maintaining the health and safety of a building.

Men removing asbestos roofing tiles

Sheep’s Wool Insulation

Before asbestos, sheep’s wool was commonly used for insulation in homes in the UK. Wool is naturally breathable and traps air well, so it’s incredibly effective as an insulating material for the winter months As a renewable material, wool is regaining popularity in eco-conscious restorations as a greener alternative to fibreglass. If sustainability is important to your business, you may want to consider wool insulation as a method for improving the energy efficiency of your commercial property.

Oak Roof Battens

Oak battens traditionally hold roof tiles or thatch in place. Oak, in particular, was used because it’s denser and more durable than modern softwood battens, usually made from fast-growing pine. Many listed buildings in the UK still require replacement with oak for historical accuracy, so this needs to be carefully considered when handling renovations or dilapidations. However, it’s worth noting that oak is heavier and usually more expensive than softwoods.

Lime Paints

Before modern emulsions, lime wash paints were used. Modern paints are typically created with petrochemicals but in the not-so-distant past, we painted homes with natural materials instead. As a breathable material, lime maintains old porous masonry well. However, lime paints require specialist skills to apply properly, and multiple coats are usually needed for opacity.

Horsehair Plaster

Before the development of plaster reinforced with mesh, horsehair was commonly used to improve the strength and performance of internal plaster within buildings. The long strands of horsehair bond with the lime plaster to limit cracking and help the set. While rarely used in modern constructions, horsehair plaster is an unusual building material still found in high-end restorations and period homes. However, it is expensive compared to more modern plaster mixes; finding skilled tradespeople to properly apply new horsehair plaster can also be a challenge.

Thatch

The use of reeds, rushes, straw or other plant materials to create a thick, water-resistant roof covering is one of the oldest building techniques still in use today. Thatched roofs were once commonplace in rural British buildings and cottages. Though picturesque, thatched roofing require specialised skills for installation and ongoing maintenance – the structure beneath may need strengthening to support the heavy weight of the thatch. It’s a classic construction feature of older properties that adds so much character to a building.

These traditional materials present challenges, but opportunities too. Their inherent qualities produce attractive, characterful buildings full of heritage. With care and expertise, traditional materials enable historically accurate restorations, benefiting preservation efforts. Balancing modern needs and preserving heritage requires imagination – and unusual materials provide a charming reminder of Britain’s architectural past.

Contact Us

Knowledge of these traditional building materials – and many more besides – gives us the specialised expertise to provide you with the chartered building surveying services you need when dealing with older properties constructed from obscure materials. Our experience with these uncommon, traditional materials allows us to properly assess their condition and serviceability, accurately estimate repair and restoration costs, and develop sympathetic repair strategies.

From project management to contract administration, we take great pride in our ability to save clients time, money and effort thanks to our unrivalled knowledge and familiarity with unusual construction methods. Contact Bradley-Mason today to see first-hand how our expertise with traditional building materials can benefit you.

DISCLAIMER: This article is for general information only and not intended as advice. Each project has its own set of unique circumstances, all potential issues should be investigated by a surveyor on a case by case basis before making any decision.

Contact our expert team banner

What to do if your building has ACM cladding

Aluminum Composite cladding Contact our expert team banner

The Grenfell Tower fire which occurred in 2017 stands as one of the greatest tragedies in modern British history. The inferno claimed 72 lives and injured 70 more, as residents desperately tried to escape from their homes in the 24-storey tower block in North Kensington.

This catastrophe cast a harsh light on the risks of flammable exterior cladding and the critical need for stringent safety regulations to protect people in multi-occupancy buildings. In the aftermath, the terms ACM cladding and ACM panels became synonymous with the Grenfell disaster. But what exactly are these products, and what hazards do they pose?

What are aluminium composite panels and are they safe?

Aluminium composite panels (ACM) are lightweight cladding panels that are meant to be ideal for external building facades and fascia to improve the aesthetic appeal and durability of buildings. The flat panels consist of two thin aluminium sheets bonded to a non-aluminium core. When correctly specified, installed and officially certified according to building regulations, this material offers several advantages.

These include:

  • Robust durability and lightweight
  • High weather resistance, particularly against rain
  • Cost-effectiveness
  • Easy installation
  • Low maintenance

ACM panels are often made with various types of cores that should be strictly reviewed and assessed for suitability and safety. These include mineral fibre (usually stone mineral wool), PUR (polyurethane) foam, PIR (polyisocyanurate) foam, polystyrene and PF (phenolic foam).

The key criteria here are the height of the structure the panels are used for and their fire-resistant capabilities. Because ACM cladding is a combustible material, it can contribute to the rapid spread of fire and release toxic fumes in the event of a fire. In the case of the Grenfell Tower disaster, the fire started in a kitchen on the fourth floor but very quickly spread to upper floors via the ACM cladding which was installed to the building’s exterior.

Was cladding the cause of the Grenfell Tower fire?

ACM cladding became notorious following the disastrous Grenfell Tower fire in 2017, when cladding with a polyethylene core was thought to be partly to blame for the rapid spread of the fire around the outside of the 24-storey block of flats.

In the wake of the disaster, it was declared that an electrical fault caused by a faulty fridge-freezer was the cause of the fire. However, following an official inquiry by Sir Martin Moore-Bick, it was deemed that the ACM cladding “acted as a source of fuel” due to the flammable polyethylene core. The Reynobond ACM cladding used was reportedly a ‘cheaper, more flammable’ option, rather than the likes of Reynobond FR or Reynobond A2 which have a fire-retardant and non-combustible core respectively. ACM cladding has also been linked to several other fires, notably the Lakanal House fire in Camberwell in 2009, where six people died.

Surveyor talking to client

Does my building have ACM cladding?

If you suspect ACM cladding on your building, the first step is to identify the material. Aviva has produced a handy checklist that highlights key observations when reviewing composite materials.

Check for:

  • Two sheets of metal – one external, one internal
  • Evidence of core material from joints, damaged sections, holes left from removed services etc.
  • Panel identification marks (e.g. UV identification code on internal face, or printed identification tape on panel edging)
  • Labels attached to the composite panels
  • Panel profile indicating the type of cladding system

The Department for Communities and Local Government has been working with the Building Research Digest to enable fire testing of samples of cladding from high-rise buildings of concern.

Shortly after Grenfell, the Department announced that in buildings with a floor over 18 metres above ground levels, and where ACM panels were identified, it would now be necessary to establish whether the panels comply with Building Regulations guidance, i.e. the core material should be a material of limited combustibility or Class A2.1.

In the years following the Grenfell disaster, close to 500 buildings have been identified as needing cladding remediation to ensure the safety of those who use them. As of February 2023, 95% of all identified buildings have either completed or started remediation work according to the Department for Levelling Up, Housing and Communities.

If you live or work in a building that has ACM cladding, it is important to be aware of the risks and to take steps to stay safe. This may include installing fire alarms and sprinkler systems and having a plan for evacuating the building in the event of a fire. Building owners are responsible for taking steps to mitigate the risks of ACM cladding, which may include removing and replacing the cladding with a safer alternative or installing fire breaks and other safety measures.

Finding ACM cladding: what should you do next?

If you have identified ACM cladding on your building, here are some essential steps you should take:

  • Check installation and support documentation to verify that the installation and the panels are approved by LPS 1500 and LPS 1531, and that the approved panels will perform adequately in case of fire.
  • Ensure that your building is insured, bearing in mind that each insurer will have their own strategy in respect of underwriting risks containing Aluminium Composite Material. Make sure that you seek your insurer’s direct advice.
  • Contact the owner or managing agent of the building. They will be responsible for taking steps to make the building safe.
  • Ensure that sufficient fire safety systems are in place, such as alarms and sprinkler systems to reduce the risk of a fire spreading, and a comprehensive evacuation plan for occupants in the event of a fire.

For specialist guidance and advice regarding cladding testing and your property portfolio, please get in touch with a member of the team at Bradley-Mason to discuss your requirements in detail. Our senior team provides expert advice throughout the lifecycle of your property, from building surveys and acquisitions to Reinstatement Cost Assessments (RCAs) and asset disposal. We combine our deep Building Consultancy skills with commercial awareness to fully understand and serve your business needs with a bespoke service to meet your current and future challenges.

DISCLAIMER: This article is for general information only and not intended as advice. Each project has its own set of unique circumstances, all potential issues should be investigated by a surveyor on a case by case basis before making any decision.

Contact our expert team banner

What is Dry Rot?

Dry Rot in the floor Contact our expert team banner

What is Dry Rot?

 Serpula Lacrymans, otherwise known as Dry Rot is a type of fungi that grows on timber.  There are six groups of fungi that are generally recognised to grow on timber, which include Brown Rots, White Rots, Soft Rots, Stains, Moulds and Plaster Fungi.  Only brown and white rot breaks down timber hence leading to serious damage, with Dry Rot being classified as a type of Brown Rot.

The Dry Rot feeds off the cellulose in the timber which allows it to spread, leaving the timber dry and brittle.  A usual tell-tale sign that Dry Rot has attacked timber is the distinct cuboidal cracking across and with the grain of the timber. Other visible signs include darkening of the timber, the timber becoming brittle and a distinctive ‘mushroom’ odour.

Dry Rot requires specific conditions in order to grow and spread.  Key requirements include damp or wet wood (moisture content above 20%), a suitable temperature of around 15-22°C and the presence of oxygen.  The most common situation Dry Rot is identified is where Timber is in contact with wet brickwork.

The life cycle of Dry Rot is typically described in four main stages;

  1. The life cycle begins when collections of dry rot spores come into contact with the timber in the correct conditions. Although individual spores cannot be seen with the naked eye, collections of spores form a reddish dust.
  1. Once in contact with the timber, the spores will germinate, producing Hyphae, which is a tube like thread and resembles fine strands or roots. A mass of Hyphae eventually form,  known as Mycelium.  As the Hyphae multiply and feed on sugars within the timber known as cellulose, the timber gradually decomposes and loses strength.
  1. Mycelium looks like a cotton wool type mass and spreads from timber through other building materials such as bricks and mortar to find new timber to feed on.
  1. The fungus also produces sporophores which is a self-reproduction organ. The sporophore sheds orange-coloured spores into the      atmosphere, which can then land on timber and if the environment is right, the life cycle of the rot begins again.


Dry Rot in the floor

Wet Rot in the floor


What are the differences between Dry and Wet Rot?

 It is a common question we get asked as building surveyors; what the difference between dry and wet rot is.  Both forms of rot are caused by fungal spores in timber which develop when the conditions are optimal.  The main difference between the two is, Wet Rot, as the name suggests requires a much higher moisture content (50%) in the timber than Dry Rot (20%).  This means that Wet Rot is more likely to form on timber that has been exposed to a persistent source of water such as leaking pipes etc.

There are also visible differences between Dry and Wet rots.  Wood rotted by Dry rot is light in weight, crumbles under touch and the wood often cracks in a cuboidal pattern.  Dry Rot Mycelium has the appearance of white turning grey silky sheets.  If the appearance is light in colour, this is known as a White Rot.  As all White Rots are types of Wet Rot, this can be used to distinguish Wet from Dry Rots.  Strands of Dry Rot Mycelium can become brittle if dried overnight, which can be used to distinguish between similar coloured Wet rot Strands.

 How to treat Dry Rot?

 As Dry Rot will only effect damp timber, removing the source of water ingress must be the first priority to eradicating an outbreak of Dry Rot.  Common causes of water ingress include leaking pipes, shower trays and baths, condensation, leaking roofs or penetrating damp through walls.

Once the source of water ingress has been removed, the affected area of the building should be left to fully dry out, ensuring the moisture content of the timber is below 20% to stop the growth of the fungus.  This can be a very time-consuming process, depending on the level of dampness, however specialist drying methods could be adopted to reduce drying times.

It is not always possible or practicable to wait long periods of time for the area to dry out completely. The use of secondary measures will therefore need to be relied upon, however in cases where these measures are required or damage is extensive, the cost of treatment will be high. The full extent of the outbreak should be determined, before removing all rotten wood, cutting away 300 – 400mm beyond the last indications of rot.  Remaining sound timbers may need treating with chemicals and replaced sections of timber should be preservative treated.

If you believe you may have a Dry or Wet Rot which is affecting your property, our experienced, chartered surveyors can help.  We will diagnose the cause of the Rot and provide expert advise on how to deal with it.


DISCLAIMER: This article is for general information only and not intended as advice. Each project has its own set of unique circumstances, all potential issues should be investigated by a surveyor on a case by case basis before making any decision.

Contact our expert team banner

Dilapidations and VAT Update

DILAPIDATIONS Contact our expert team banner

As many are aware, the HMRC has revised their approach surrounding the treatment of VAT on payments relating to damages and compensation i.e. dilapidations. The new approach we understood will come into effect from 1st March 2021, after the HMRC have advised a push back from the initial date of 1st February 2021.

Following recent rulings in the European Courts of Justice, compensation and damages payments for exiting a contract early have been considered as a payment which is envisaged under the contract, hence should be consider for VAT. Previously, HMRC classified such payments as outside the scope of VAT because they were not paid under the contract.

Whilst there is still uncertainty regarding the impacts to dilapidations settlements, it is considered that such payments of damages, will fall within the scope of VAT. Landlords and Tenants therefore need to plan for this and consider the implications of VAT at an early stage, including making allowances from a cash flow perspective.

We appreciate dilapidations can be a mind-field, never mind the complexities surrounding VAT and here at Bradley Mason, we are well placed to advise how best to exit your property. Please do not hesitate to contact the team for further assistance.

Dilapidation House


DISCLAIMER: This article is for general information only and not intended as advice. Each project has its own set of unique circumstances, all potential issues should be investigated by a surveyor on a case by case basis before making any decision.

Contact our expert team banner
Call Now Button